
Learning how to tie pointe shoes is essential for any ballet dancer. This guide breaks down each step to help you secure a comfortable and supportive fit. Let’s start tying pointe shoes so you can confidently dance.
Key Takeaways
- Proper preparation of pointe shoes, including sewing ribbons and breaking them in, is essential for a secure and stable fit, contributing to performance quality.
- Maintaining foot hygiene and using toe pads can prevent discomfort and injuries, while proper foot alignment is critical for safe dancing on pointe.
- Careful attention to ribbon wrapping, knot tying, and correctly adjusting elastics and drawstrings ensures the support and comfort necessary for successful performances.
Art de Podcast
How to Tie Pointe Shoes: A Step-by-Step Guide

Preparing your pointe shoes lays the groundwork for a secure and comfortable fit. Start by firmly sewing the ribbons onto the boots. This will stabilize the foot and prevent unwanted movement during performances. Well-sewn ribbons keep and tie your pointe shoes in place, supporting intricate ballet movements.
After sewing the remaining length of the ribbons, check the remaining length to ensure they are manageable. If the remaining ribbons are too long, shorten them to facilitate easier tucking and prevent fraying.
Tying pointe shoe ribbons firmly to shoes is crucial not just for aesthetics but for the support and stability of your feet. Properly tied pointe shoe ribbons can mean the difference between flawless and painful performance. Make sure to tie pointe shoe ribbons to shoes with ribbons that are tight enough to hold but not so tight as to cut off circulation.
Before tying a knot in the ribbons, break in your pointe shoes by gently bending the shank with your hands to make them more flexible. This ensures they conform to the shape of your foot, allowing for a more comfortable fit and improved performance.
In summary, proper preparation of your pointe shoes is indispensable. Sewing the ribbons and breaking in the boots contribute to a secure and supportive fit, enabling you to perform your ballet routines gracefully and confidently.
Getting Ready: Foot Preparation
Preparing your feet is crucial before putting on your pointe shoes. Ensure your feet are clean and dry, and apply toe pads or gel cushions for added comfort and protection from the pressure of dancing in a pointe shoe. Skipping this step can lead to discomfort and injury.
Hygiene is also essential. Many dancers neglect washing their toe pads, leading to foot issues over time. Clean toe pads extend their life and help maintain foot health, preventing infections and other problems.
Another common issue among dancers is curling their feet and toes while dancing. This indicates a lack of proper muscle usage and can lead to foot and ankle injuries. Additionally, rolling ankles is a prevalent problem that can result in serious foot and ankle injuries. Proper foot and ankle alignment is essential to avoid these issues and stay injury-free.
Focusing on foot preparation sets the stage for a comfortable and secure fit in your pointe shoes. Clean, well-cushioned feet, combined with proper muscle usage and alignment, enable you to dance confidently and safely.
Sliding Into Pointe Shoes

The next crucial step is sliding into your pointe shoes correctly. Ensure you tie your pointe heel snugly at the back of the bottom of the shoe to prevent slipping. A secure heel fit provides stability and comfort, enabling confident performances.
Slide your foot into the shoe slowly and deliberately, keeping your heel pressed against the back and outside ankle to ensure a secure fit and reduce the risk of blisters and discomfort. Adjust the drawstring firmly to eliminate any excess material.
Like a thin foam layer, minimal padding protects your toes without compromising foot movement. This allows for a natural feel and better control during dance routines. Ensuring a snug fit and proper alignment sets the stage for a secure and comfortable performance.
Wrapping the Ribbons
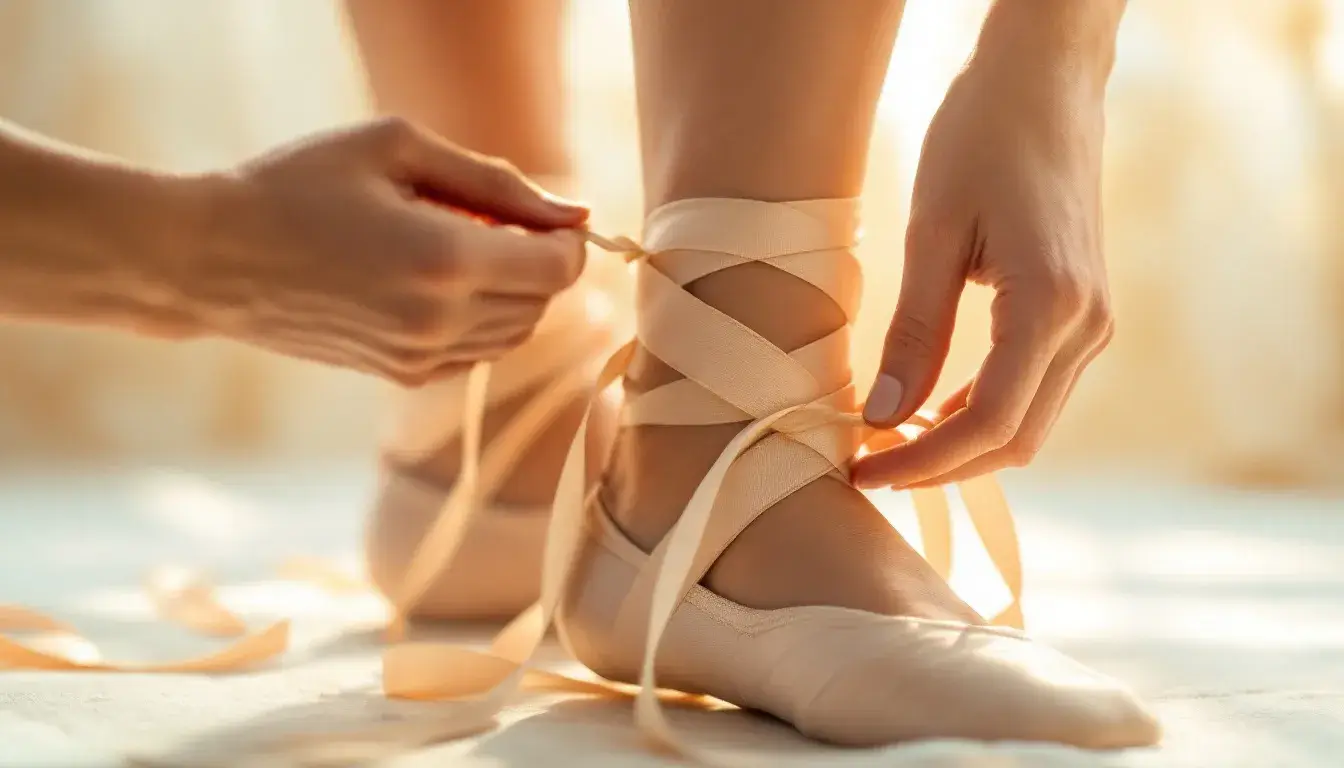
Wrapping the ribbons firmly demands precision and attention to detail. Stitch the ribbons from low inside the shoe to stabilize the heel against the foot, keeping the shoe in place and providing support during ankle flexion.
When wrapping the outside and inside ribbons, the ribbons cross together. Draw the same ribbon behind the outside and inside ribbon around the ankle to ensure a secure wrap. This technique helps the ribbons cross properly at the front and back of the ankle, contributing to a neat and proper fit.
Next, we’ll cover positioning the first ribbon, securing the first ribbon to the same ribbon as the outer ribbon, and tying the other ribbon to the same ribbon with a double knot. Each step ensures your ribbons stay in place and provide the necessary support for your performance.
Positioning the First Ribbon
Start by positioning the inside shoe ribbon against the whole foot and inner ankle. This initial shoe ribbon placement is crucial for optimal support throughout your dance routine.
Wrap to wrap and tie, wrap and tie, wrap the inner ribbon around the ankle one and a half times before securing it. This ensures a snug fit and necessary support without being too tight.
Properly positioning the first ribbon is crucial for the stability of the pointe shoe. It sets the foundation for the subsequent steps and ensures the other ribbons stay in place.
Securing the Outer Ribbon
After positioning the tie on the inside ribbon, secure the tie on the outer ribbon, which is shorter. Wrap and tie it around the outer ribbon ankle after the inner ribbon to cross-layer the ribbons for additional support.
Wrap the outer ribbon and cross it around the ankle once before tying it. Pull it firmly to the knot and ensure it crosses over the first ribbon without slack, maintaining the tension and support needed for your performance.
Properly securing the outer ribbon ensures it stays in place, providing the necessary support for a successful performance.

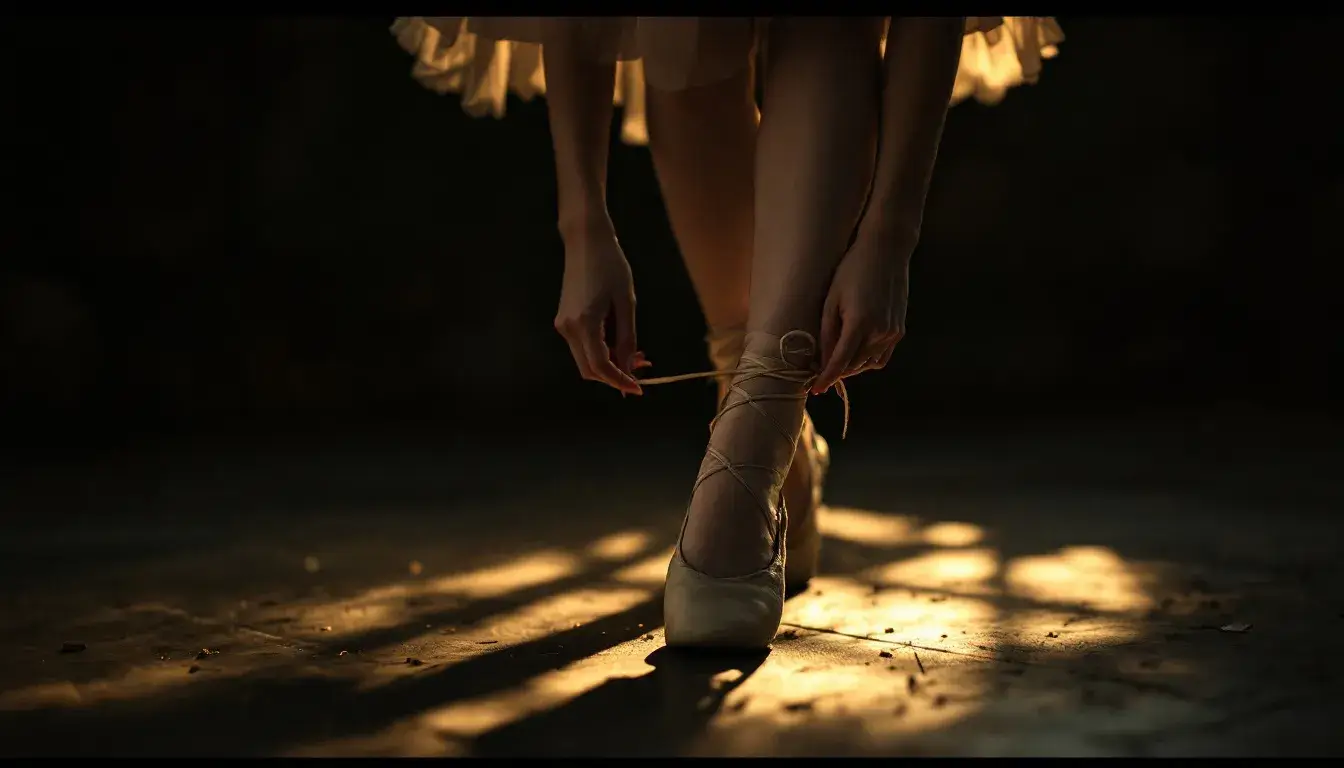
Tying a Double Knot
The final step is to tie a double knot above the ankle bone. This placement ensures that the remaining length of the double knot sits comfortably, does not interfere with movement outside the ankle bone, and provides a secure fit.
To avoid discomfort, tie the double knot and sit comfortably inside the ankle bone in the space between the ankle bone and the Achilles tendon. Ensure the double knot is firm yet not overly tight above the outside ankle bone.
A securely tied double knot keeps the ribbons firmly in place, providing the support needed for your performance without causing discomfort.
Adjusting the Elastic Bands
Adjusting the elastic bands is crucial. When sewing elastics, position them approximately one centimeter from the back seam for an optimal fit, ensuring they provide support without slipping.
Align the elastics with the foot’s natural curve and avoid sewing them too tightly to prevent injury to the ankle’s soft tissue. Securely sew the elastics to the shoe to prevent slipping during performances.
Check that the elastics allow movement without excessive tension to test the fit. Properly adjusted elastic bands contribute to your pointe shoes’ overall comfort and support, ensuring a secure fit.
Final Touches: Ensuring Comfort and Fit
Before stepping onto the stage, it is essential to make the final touches to ensure comfort and fit. Adjust the drawstring after placing your foot in the shoe to eliminate excess fabric and achieve a snug fit without cramping. Ensure your toes lie flat without bulging over the top of the shoe, just touching the end when standing in a plié position.
Feeling lifted and supported in your pointe shoes is crucial for a successful performance. Ill-fitting pointe shoes can cause various injuries. A knowledgeable fitter can help you choose the right shoes, preventing injuries and ensuring a comfortable fit.
Common Mistakes to Avoid
Avoiding common mistakes when tying pointe shoes for a secure and comfortable fit is crucial. One frequent error is not following the school’s preferred method of tying pointe shoes with ribbons. Check with your teacher to ensure you use the proper technique.
Using one knot over a double knot keeps the ribbons secure, preventing them from coming undone during performances. Avoiding these two common knots and ribbon mistakes ensures a safe and comfortable fit for your pointe shoes.
Summary
In conclusion, mastering the art of tying pointe shoes involves several crucial steps. Each step is essential for achieving a secure and comfortable fit, from preparing your feet and pointe shoes to sliding into them and wrapping the ribbons together. Paying attention to the details and avoiding common mistakes ensures that your pointe shoes provide the support needed for a successful performance.
Remember, practice makes perfect. These steps and tips will give you the confidence, ballet experience, and knowledge to tie your pointe shoes like a pro, ready to dazzle on stage.
Frequently Asked Questions
How do I know if my pointe shoes fit correctly?
Your pointe shoes fit correctly if your toes touch the end of the shoe while in a plié position, and your foot feels adequately lifted and supported without slipping. Ensuring both comfort and support is essential for a proper fit.
What should I do if my ribbons keep coming undone?
To prevent your ribbons from coming undone, consider using a double knot for each other’s ribbons for added security. This two-knot technique for the same ribbon as another ribbon will help keep them secure during use.
How can I prevent my toes from hurting while dancing?
To prevent toe pain while dancing, it is advisable to use toe pads or gel cushions for added comfort and protection against pressure. This will help alleviate discomfort during your performances.
Is it necessary to use toe pads?
Using toe pads is not mandatory, but they can greatly improve comfort and protect your toes from injury.
What is the best way to break in new pointe shoes?
The best way to break in new pointe shoes is to gently bend the entire ankle while using your hands to assist. This approach enhances flexibility and comfort, allowing for a more customized fit during practice and performances.
How tight should pointe shoe ribbons be?
Ribbons must be snug enough to anchor the shoe and support the ankle, yet loose enough to wiggle your toes and feel normal blood flow. A good test is to press your finger between the ribbon and skin; it should slide in with slight resistance.
What ribbon material is best for sensitive skin on the ankles?
Stretch satin blends or satin-front ribbons with concealed elastic cores reduce friction, conform to the leg, and minimize pressure points for dancers prone to chafing.
Is tying pointe shoes different for absolute beginners?
Yes. Beginners usually wrap the ribbons only once around the ankle, keeping the knot on the inside for easy adjustment, and avoid complex criss-crosses until ankle strength and proprioception improve.
How do you tie pointe shoes if you have flat feet or low arches?
Begin by seating the heel fully, wrap the inside ribbon first to create a gentle lift under the arch, then cross the outer ribbon higher on the ankle to prevent the shoe from gapping at the sides.
Can elasticized ribbons replace traditional satin ribbons?
Elasticized ribbons are acceptable in most studios and provide continuous tension without cutting off circulation. Sew them at the usual angle, wrap once, overlap slightly above the ankle bone, and secure with a small square knot.
How should I tie ballet slippers on toddlers so they stay on?
For preschool dancers, sew a single piece of wide elastic in an X across the instep, then tie the drawstring in a double knot and tuck it under the insole; avoid ribbons altogether to prevent tripping.
How do I keep ribbon knots from digging into my Achilles tendon?
Tie the knot just below the medial malleolus (inner ankle bone) rather than directly on the Achilles, and flatten it with your fingernail before tucking under a ribbon layer.
What’s the quickest tie method for backstage costume changes?
Pre-tied loop ribbons save time: sew one end permanently, slip the loop over your foot, twist once to form a figure-8, and pull the loop ends to tighten—no knot required.
How often should I replace pointe-shoe ribbons or elastics?
Replace them whenever they lose stretch, show fraying along the edges, or after about 60 hours of class and rehearsal—whichever comes first.
What is the best way to tuck ribbon ends so they don’t slip out on stage?
Slide the trimmed ends under two layers of ribbon and anchor them with a dab of rosin or a discreet strip of double-sided dancer’s tape.
How can I clean dirty pointe-shoe ribbons?
Spot-clean with a mild, color-safe detergent on a cotton swab, rinse with a damp cloth, then press flat under a warm—not hot—iron using a pressing cloth.
Do I need to tie pointe shoes differently over bare feet versus tights?
When wearing tights, ribbons grip better, so a single wrap generally suffices. Over bare skin, allow a tiny bit more tension or add a thin elastic under-wrap to prevent slipping.
Why does my drawstring keep loosening, and how can I secure it?
Drawstrings made of elastic often creep. After tightening, knot the ends twice and place a tiny drop of clear nail polish on the knot to keep it from sliding open.
How do I tie pointe shoes for a high instep?
Angle the ribbons slightly forward, wrap them higher on the ankle, and use an elastic loop across the heel to prevent gaping while allowing the arch to breathe.
Can male dancers use the same ribbon-tying method?
Yes—when a role requires traditional footwear, men typically use the identical wrap pattern but often place the knot slightly lower to accommodate stronger calf musculature.
What’s the safest way to tie decorative ribbons on street-wear ballet flats?
Use a single ankle wrap, make a bow on the inside of the ankle so the laces don’t catch, and knot the bow loops individually to prevent untying while walking.
How do I lace pointe shoes with a single-loop elastic?
Sew a continuous elastic loop where ribbons normally attach. Slip it on, twist once to create an X over the instep, then pull the back of the loop over the ankle so it lies flat and secure.
What safety checks should I perform after tying pointe shoes?
Before going en pointe, point and flex each foot to confirm the ribbons stay put, verify you can still feel your toes, and ensure no ribbon edge digs into the Achilles or peroneal tendons.